

The My Safe Florida Home roof grant is one of the best real opportunities Florida homeowners have to harden their home and potentially reduce insurance costs—but it’s also one of the easiest programs to “mess up” with bad timing and weak paperwork.
Here’s the hard truth: the program can be popular and still be a bottleneck. Recent reporting says lawmakers are not adding new money in the 2026 cycle, even as demand remains high, so speed and clean documentation matter.
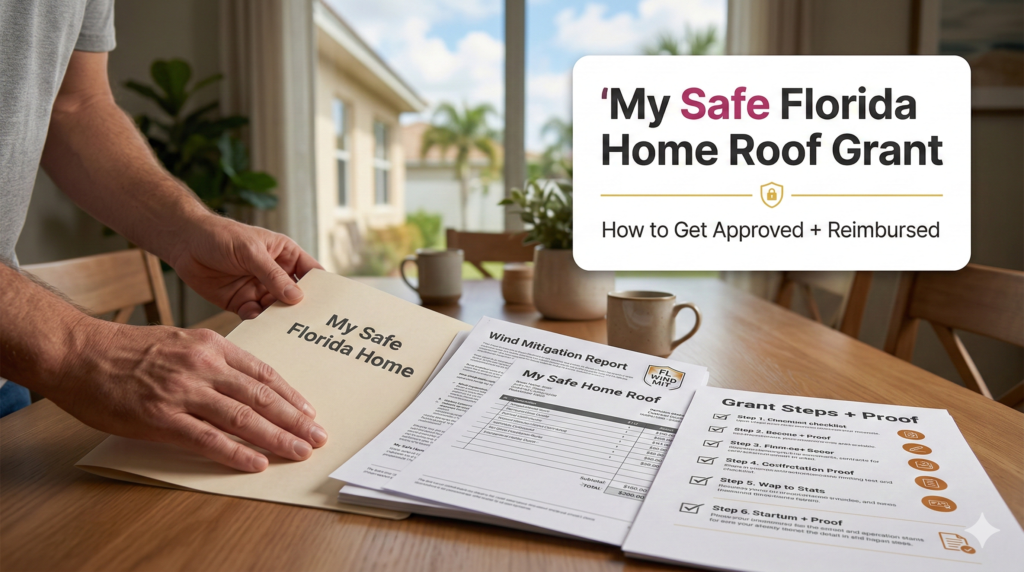
This post breaks down the process in plain language and shows you exactly how to build a proof package that moves smoothly from inspection → grant → reimbursement.
Official program site (DoFollow): https://mysafeflhome.com/
Before anything else: what the program actually is
The My Safe Florida Home program offers free wind mitigation inspections and grant assistance for eligible homeowners to complete approved hurricane-hardening improvements (often including roof-related upgrades based on the inspection recommendations).
Also important: the program’s own guides emphasize that approval doesn’t automatically guarantee payment unless guidelines are followed exactly.
So treat the My Safe Florida Home roof grant as a process you must manage—like a mini compliance project—not just “free money.”
9 critical steps to win the grant (and get reimbursed)
1) Confirm eligibility and move fast (funding pressure is real)
The program has seen heavy demand, and news coverage in February 2026 indicates no new funding is being added this cycle.
That doesn’t mean you can’t get it—it means you should not delay once you’re eligible and moving through the portal steps.
Action: Create your portal account and complete the inspection application flow as early as possible.
2) Treat the free inspection like a blueprint—not a formality
The inspection is the foundation. It identifies what improvements are recommended and what may be eligible for funding.
Even if someone doesn’t receive grant funding, the inspection can still help with insurance conversations by documenting mitigation features (depending on what exists).
Pro move: When the inspector comes, make it easy for them to document the roof and attic conditions (safe attic access, clear photos).
3) Don’t start work until the program steps say you can
This is one of the most common homeowner mistakes: starting work early and then realizing the program needs specific sequencing, approvals, or documents to reimburse.
The Homeowner’s Guide notes that reimbursement/payment requires following the program rules and guidelines.
Action: Keep everything aligned to what your portal requires at each stage.
4) Contractor selection: use the right contractor and clean scope
Your reimbursement speed depends on:
- a clear itemized scope
- dates
- address match
- proper contractor identification in your portal
Program documents emphasize documentation and process steps for grant and reimbursement.
Pro move: Ask for an invoice that is itemized, includes project dates, and clearly separates eligible line items.
5) Roof work strategy: prioritize “high-proof” improvements
For roof-related funding, the fastest approvals usually come from improvements that are:
- clearly recommended by the inspection report
- permitted and inspectable
- easy to document with photos and invoices
If your goal is the My Safe Florida Home roof grant, your job is to make the underwriter/admin’s job easy: clear documents + no ambiguity.
6) Build your “Grant Packet” (the single PDF rule)
Here’s what slows people down: scattered screenshots, missing pages, and invoices that don’t match what the program expects.
Use one clean packet (PDF) containing:
- inspection report summary pages (as needed)
- contractor itemized invoice(s)
- proof of payment (paid invoice / receipts / cancelled checks / bank documentation, depending on what you have)
- any required insurance communication if requested
- permit/final inspection documents when applicable
The program’s step-by-step reimbursement flyer and guidance list the types of proof typically required (invoice + proof paid in full + final inspection + insurance proof documentation).
7) Understand the reimbursement sequence (this is where people get stuck)
The program’s reimbursement materials outline a sequence like:
- complete work
- request a final inspection to verify upgrades
- submit required documents
- provide insurance-related proof documentation after the final inspection report is provided to the insurer
Key takeaway: reimbursement is not “automatic.” It’s a compliance workflow.
8) Avoid the fastest way to get delayed: missed RFI deadlines
Program materials explicitly warn about responding to RFIs (requests for information) within a deadline window; if you don’t respond, cases can be closed.
Action: If the portal requests anything, respond immediately and upload clean documents.
9) Use the inspection + grant as a long-term insurance strategy
Even if your grant takes time, the inspection and the upgrades are useful beyond the program:
- stronger home performance during storms
- improved mitigation documentation
- potential premium impacts depending on your insurer and verified features
That’s the “real ROI” of the My Safe Florida Home roof grant—not just the check.
Where Roof Roof fits (so you don’t waste time)
If you’re doing roof-related work and want it to move smoothly through documentation and inspection, you need:
- clean scope and itemization
- permit-ready work when applicable
- photo documentation during critical stages
- a reimbursement-minded paper trail
See our <a href=”https://roofccc.com/services/”>roofing services</a> and if you want help building a clean grant packet, <a href=”https://roofccc.com/contact/”>contact Roof Roof</a>. For more Florida insurance/roofing guides, visit our <a href=”https://roofccc.com/blog/”>blog</a>.
Investor note (rentals and value strategy)
If you’re improving properties to stabilize insurance and reduce storm risk, you need upgrade sequencing and documentation discipline across the portfolio. That’s exactly what JReyes Investments is built for: https://jreyesinvestments.com
When you need GC coordination (multiple trades + permits)
If the project includes roofing plus opening protection, structural connectors, or permit-heavy scopes, GC coordination prevents delays and scope gaps: https://toltcgc.com
If you want the process to move fast, treat the My Safe Florida Home roof grant like a checklist: correct sequence, clean documents, and quick responses.
CTA
The My Safe Florida Home roof grant can be a big win—but only if you treat it like a documentation and timing project. If you want help aligning the roof scope, permits, photos, and reimbursement packet, reach out to Roof Roof and we’ll help you run it clean.
If you’re planning work, check our roofing services.
Want help with documentation and scheduling? Contact Roof Roof.
For more guides, visit the Roof Roof blog.
Sources (external, DoFollow)
Official program site: https://mysafeflhome.com/
Step-by-step to get a grant (PDF): https://mysafeflhome.com/wp-content/uploads/2025/10/MSFH-2025_Step-By-Step-to-Get-a-Grant-Flyer.pdf
Reimbursement process flyer (PDF): https://mysafeflhome.com/wp-content/uploads/2024/06/MSFH_Reimbursement-Process_Flyer_6_24_24.pdf
Step-by-step reimbursement flyer (PDF): https://mysafeflhome.com/wp-content/uploads/2025/10/MSFH-2025_Step-By-Step-For-Reimbursement-Flyer.pdf
Funding context (news):